Showing posts with label Teaching Through Play. Show all posts

Tuesday, February 3, 2015

10 Tips of the Trade: Things I've Learned Homeschooling Preschool

I have been a preschool-homeschooling mom for two years now. My daughter starts kindergarten in the fall, and I'm confident she will do wonderfully, she knows her letters, can tell time, knows the days of the week and the months of the year, is excellent at colors... the list goes on. That said - I'm glad I have a second daughter to do things differently (HAHA!) Here's a list of the things I've learned while reinventing the wheel, I mean teaching preschool.

The 10 biggest things I've learned:  

1) Get an excellent / cheap printer. Epson has the cheapest inks that I've found, and they print in good quality. They aren't a photo printer, but they're excellent for school work.  

2) Have the $1 Store be your first stop EVERY time. I go to the dollar store almost as much as I go to the grocery store. I especially hit it in August and late December early January. Need a poster board? They sell 2 for $1. Need more stickers? Rewards? Glue? Pens? Foam letters? Fuzzy Pipe cleaners? They even have awesome preschool-3rd grade books with school work pages.

3) Invest in a laminator. I grabbed mine from Target for $30-ish. It is easy and I've only ever had one jam (and that was when my daughter was playing with it) and I've laminated close to 60 pages. I will say I was certain I would use the 4x5 pockets - I haven't used one yet, just go with the plain sized paper pockets. Not only will it save on printing, it will also allow your kids to write and wipe (with a dry erase marker), and stick things over and over. All of my calendar is laminated, it works wonders.

4) Set up a Pinterest. If you don't have one already (how have you avoided it?!) set up at least one board for each school year you homeschool. This is one of the coolest ways to get inspiration. You can find printables, crafts, science projects...etc.

5) Join Teachers Pay Teachers. This website is awesome! Its also great for all education levels. The account is free and there are tons of free projects in it (use the left hand side to narrow your search) I have honestly taken a lot of my print outs from the free section - I've only spent $8 on it and I felt it was well worth it.

6) Set up a permanent homeschooling spot - even if its at the kitchen table. You'll need storage, wall space, somewhere for projects to dry, and its best not to do it over carpet, if you have to - get an area rug. Having a space is ideal because it helps the kids know its School time and not time to play and get distracted.

7) Be flexibly disciplined. Listen to your kids, there are certain days when I just know that preschool is going to be a bear. Its during those days that I call an audible and we either do a fun project, something relaxed like a color by number, or we skip it all that day and make it up the next. You'll learn when your children have better focus. I find our best focus right after snack and lunch time and that is when paper-work should happen. Art projects can be scattered where-ever, and science *sometimes* will help settle them down.

8) Variety is the spice of life, and preschool. No one wants to do the same thing over and over and that's the truth especially with young children. That said repetition is one of the best ways to ensure something sticks. Varying how something is taught and practiced helps a lot. For example if you're teaching small, medium, and large, try it with a page, blocks, and the Leap Frog Tad movie, three different ways to encourage learning the one concept.

9) Curriculum, curriculum, curriculum. This ones the hardest and most fun for me. The planning stages. Every Sunday or Monday I plan for about 2 hours of my day. Usually I get about a weeks worth done in that time. At the beginning of the school year I planned out a rough curriculum, I pulled up a variety of Kindergarten readiness tests, and made sure the points in them were covered in our studies.

10) The biggest thing I've learned so far though is to do it. Invest time in your kids and their learning. After all - they're a huge part of you.

Friday, December 26, 2014

All Things Are Possible


"It always seems impossible until it's done." ~Nelson Mandela.  This quote has just become my favorite of all time.

In September I gave birth to my second dear daughter, Ky-Ky.  While I was pregnant woman, I was nervous.  Would I be able to juggle life with a new baby and a 5 year old?  Would my homemaker duties suffer?  Would my oldest think I don't love her enough with a new baby stealing so much attention?  Would I be overwhelmed and curl into a fetal position and hide in the closet watching eagles?  (Name the movie! Video at the bottom if you give up!) 

I must admit, I think having two children has helped.  I feel more focused.  My days are spent with my dollies, my house is cleaner, we eat more dinners at home, heck we do preschool on a regular basis!  When I posted this on my mom's group on Facebook (Are you part of one of these? OMG They are my GIRLS man!  I love seeing their posts and there are days where everyone just needs to vent and these ladies get me!) some of the ladies asked for tips - so here you go.  

What's changed:

1) Humility.  I was on bedrest for almost 4 months.  During that time I had to humble myself and ask for help.  I'm not supermom, never have been, but asking for help allowed me to...

2) Balance.  My cousin-in-law whom I love dearly came over on a daily basis and whipped my house into shape.  Now I don't know if its because she's worked hospitality at some major hotels, or if she has a certain level of OCD (Love you sweetie!) or what, but I have never had my house be and stay as clean as that.  She was at our house for only a few hours a day, and most of that was spent with me and my first daughter, not cleaning-cuz it was done!  She'd done it!  I watched her balance and learned quite a bit.  And I realized that I have never been able to find that balance myself.  Now I love my mom and my MIL who have both helped me out, and I learned how to clean from my mom, but for some reason seeing Ari do it I learned it.  

3) Accountability.  I gave myself too much slack.  I used to always whine about how awful I was for not doing stuff...instead of doing it (makes sense right?)  Now if I catch myself thinking "wow I'm such a slacker." I make sure to stop slacking and set myself a mini goal.  I hold myself to an end goal and its made me happier.  

4) Happiness.  I didn't realize that I could be happy without a lot of down time.  This too came from my 4 months of bedrest.  There is a LOT of time for self-reflection when you can't do anything!  I always thought I was happiest when I was playing video games or watching TV or out shopping and going to festivals.  But I have realized that I can be just as happy by taking pride in what I own, by organizing the house and keeping it clean, by playing with my dollies and watching a Disney movie. 

5) Acceptance.  Allowing myself to say enough is enough.  I have always berated myself, I've never been "enough".  For some reason this aforementioned movie struck home and made it 100% clear to me, maybe it was because I felt so like Ally so much of the time.  This scene is incredible, whether you believe in God or not, and sums up much of what I have been trying to live by recently. 


6) Inspiration.  Dozens of things have inspired me, my two dollies do, absolutely.  My husband, my cousin, my parent's, my in-laws.  Media too: Mom's Night Out, a book called "The Gabriel Method" which oddly enough is about weight loss but has inspired me in hundreds of other ways, The 5 Love Languages...

In the end...well there is no end.  That's something I continually am trying to accept.  Every day is a journey.  Some days I'm awesome at following these changes in my life, and some days I find myself regressing.  But I'm changing.  I'm learning and accepting myself.  So if you're planning on making a long, or at least grueling, New Year's resolution, remember that "It always seems impossible until it's done."


~~~~~

The movie:  Mom's Night Out


Tuesday, August 19, 2014

Sand and Sea Pudding

This week She-she and I are studying the Sea for preschool, and on today's list was a delicious treat that I am enjoying so much I figured I'd share.

Sand and Sea Pudding - a piece of the Beach.

Sand and Sea Pudding

Auntie and She-she mixing up the jello
Here's the yummo recipe!

Sea Jello
1 small box of blue Jello (We used Berry Blue)
1 small box of green Jello (We used lime)
Your fave berries for "Fishes" - we used 7 strawberries, and 7 cherries, and 1 banana sliced into 7 pieces.  (7 is our number of the week if you hadn't guessed.)

Prepare Jello as instructed on the box, stir the fruit in about 45 minutes in the fridge so there are some under the water and some above and its bumpy like waves.

Sand Pudding

(I honestly eyeballed most of this and it came out fantastic, which is great when you are doing this with young children inevitably some ingredients end up on the counter, the original recipe called for whipped topping too, but I didn't have any so I just cut it - so good and not necessary in my opinion!)

She-she grinding up the sand, we used a rolling pin to crush.
3/4 box of Nilla Wafers (I saved enough for some snacks for the rest of the week, as She-she had never had them)
2-3 Oreos (or black knock off frosted cookies, they're for color more than flavor.)
6-8 oz. whipped cream cheese
1/2 stick butter
2/3 c powdered sugar
1 box of Vanilla pudding
1 box of Coconut cream (You can interchange either flavor as you wish.  I was thinking one butterscotch and one vanilla would be good next time.)
2 3/4 cup milk

Start by putting the cookies and wafers in a zip top bag and letting your preschooler go at it, crush those cookies, crush them! (You can also use a food processor, but so much more fun for the kids to grind it up.)  Once all "sandy" set aside.

Whip together the cream cheese, butter and sugar, set aside.  Prepare the puddings, and mix them into the cream cheese mixture.  This is mostly to keep it nice and smooth.  Then top your set up Sea Jello with the pudding, and pour the "Sand" over that.  Its so good.


Tuesday, August 12, 2014

A is for Acorn!

School has officially started with a bang in the Dollighted house.  

Here is what our Monday schedule looks like:

Monday - Chores, breakfast, life, etc - first, Library, Calendar Time, Library Book, Craft, Uppercase A page, and "dittos" about the Capital letter

As always we did our Calendar Time.  We have been practicing our Month and Day songs for almost a week now, and She-she seems to be getting the hang of it pretty well.  We also pulled in our first exercise in "charting" with the Weather Chart, matching up the symbols from the weather we charted last week and coloring them in on the page in the proper place.  I was shocked how much this excited her, the idea of seeing what the weather was last week and how it will compare to this week really made her happy.

To sort of ease her into school again after a long summer of relaxing, I chose to start off with an A week.  She-she's name starts with A, so its one she's hugely familiar with and can write out pretty easily.

My goals this week are to hit our Wow's, which are:

Letter of the Week ~~ A
Number of the Week ~~ 8
Color of the Week ~~ Amarillo / Yellow
Animal of the Week ~~ Alligator
Food of the Week ~~ Apple
Shape of the Week ~~ Circle

So our first focus after the library and calendar was our Library book.

We learned about the Long A sound (A as in Acorn!) and the goal here was to read a book about Acorns.

We read Scared Squirrel goes Camping by Melanie Watt.  I had wanted Little Acorn Grows Up by Edward Gibbs, but that happened to be checked out and though I reserved it last Thursday and it said it was on the shelf it wasn't yet to my library~so make sure if you're putting books on hold you give yourself about a week for books to come in! :'(


This book, even though not what I first pictured ended up being adorable, and there were plenty of acorns for us to count throughout the book as well.  The other thing I loved about Scaredy Squirrel was how many fun interactive pieces there was to the story.

We had maps, complete with a cool key that we used to interpret the map:


We had graphs, there even happened to be a weather graph, which we had just charted and She-she was excited to compare to what we'd just done:


And several ways to interact physically with the book, like this warm up routine:

We had so much fun doing all the acting out of Scaredy Squirrel's adventures that it took us a while to get through the book, which is fine with me - it kept us away from the TV for almost a half hour itself!
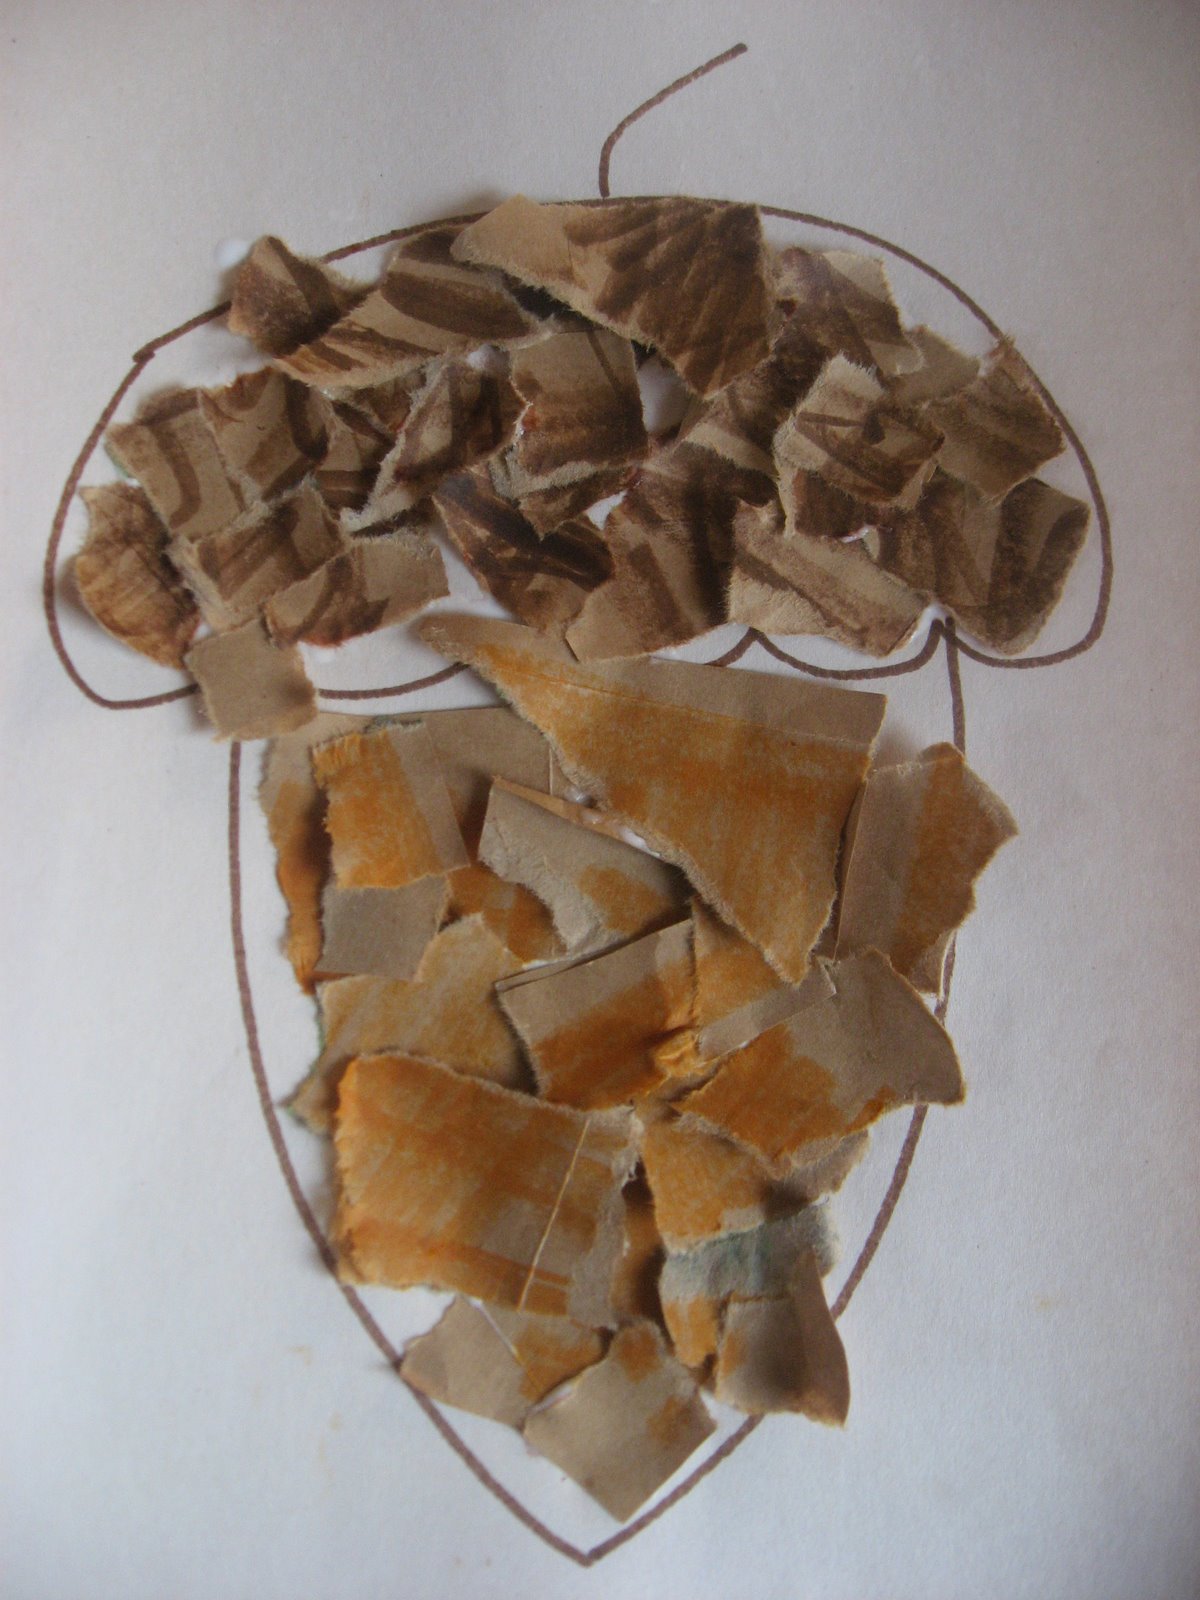
She-she's Acorn

Once we completed our library book we decided to make our own Acorn project, which I snagged from Pinterest and a blog called "No Time for Flash Cards" which is super awesome by the way!

No Time for Flash Card's project
 
I didn't get the opportunity to run to the store for the brown paper bags, so we used orange and yellow construction paper.

After Craft time we did our dittos. An A page to practice her capital letters.  As my daughter doesn't love to focus through an entire page of letters, we focused only on the uppercase A.  I love this set from The Moffatt Girls.

I also picked up a book from Target called, Workbook Rhyme Time, A Frog on the Log - unfortunately I can't find it online to link it, sorry.

We did the "AT" page, and then wrote on our chalkboard.  I think this was almost She-she's favorite part of the game (She loves writing on her easel) and she loved putting different letters in front of "-at" and deciding if it said a real word or a "funny" word.

That's what our first day of school looked like - what are your favorite Acorn projects?


Monday, August 11, 2014

Playing School: Assessment Time

If your child has never done any schooling this may come as a complete shock to you: Children are brilliant.

She-she, around age 1.
Ask a child what color such and such is, and whether told previously or not, they'll likely be able to tell you, or describe it like "well it looks sorta like red, but is lighter".  They might recognize things like the star beside the elevator button, or at the very least, that parking under the Golden Arches likely means burgers are about to be had.  That's because young children learn by observation more than most anything else.

My husband will forever remember the day our beautiful little almost 1 year old sat up on his lap placed a finger on the tip of his nose and declared triumphantly, "Nose!"  It was her first word.

 So when you sit down with your little toddler to do these "I Can" pages and take the "Readiness exam", you may be completely shocked to realize your child might be able to do a lot more than you thought, thus allowing you to dive a little deeper than you had planned.

That's why I really recommend doing these with your children, and the more excited you are about it the more excited they will be.

The first thing I recommend is the I Can... Assessment, its pretty basic, but deep enough to allow your child the opportunity to show off - not to mention its free, cute, and not as intimidating as the dozens of pages I've found in other packets.  (You do have to sign up for a Teachers-Pay-Teachers account, but that too is free, and not intense.  I've pulled tons of packets from here and really do recommend it.)

http://www.teacherspayteachers.com/Product/I-Can-Simple-Daily-Assessments-for-the-First-Week-809903

The other is an online website called SchoolSparks that has a Kindergarten Readiness Test.  The most excellent part of this test is that it includes a variety of assessments from math skills to gross motor skills, and provides feedback on how you can help your child grow in the areas they're weakest.  (The chart below is not She-she's, I just clicked through it quick to show you the end graph.)


She-she and I sat down and did the I Can... series together to prep her for school this week, and when I loaded up the SchoolSparks sight I had her near to play with, she enjoyed hopping on one leg and showing me "she could do it" to so many of the questions.  Be excited, and they will be too!

Tuesday, August 5, 2014

Playing School - Our Daily Start

One of the things our Kindergarten asks for our children to learn is the calendar.  They should know the days of the week, the months of the year, and have a general knowledge of the clock.  Since my daughter could maybe tell you that Friday was a day, but couldn't tell you when day it was, I figured we needed to really dive into the calendar, thus our Daily Start with Calendar Time!

Let me first explain our "Calendar" and link you to some great places where you can make your own.  In total I spent about $30 in this because I really wanted a laminating system to get all the individual little parts.

Break Down:
$0.69 for the wildly pink poster board. (My daughter's choice)
$27.99 for the laminating system.
About $0.50 worth of white paper...if that.


We have our actual calendar, which I got from TpT.  This will be our daily start to bring us into focus for school.  We'll start by singing the Months of The Year to the tune of Ten Little.  Then we'll put up the day of the month it is, count to that number, and sing our Days of the Week to the tune of The Adams Family.


Then we'll move over to our clock.  I really wanted one that included the :00, :05, etc. so I opted for one similar to this one.  We'll discuss what time it is, and AM and PM, when lunchtime is etc.

Then we will go to our weather chart and weather bear.  I created my own weather bear, which is really simple to do, but there are dozens of links out there for both the chart and the bear.  I'll be scanning it in soon so everyone can have access to it - I just can't get to it today.  (Oh the joys of pregnancy! haha)


Once we have completed the calendar we'll do our "Wow's" (___ of the Week).  It will include color, number, shape, letter, food, and animal.  

I think our daily start will be a great way for She-she to focus in on school and be prepared to start the day.  

Monday, August 4, 2014

Playing School - Preschool Style, 6 things to Get Ready for Homeschool

My She-she is five years old this October, missing the cut-off for Kindergarten by only a few days.  I could have tested her to see if we could force her into Kindergarten, but we have big changes, a new baby and possible move.  I knew I wanted her learning and growing, but I didn't want to put her in a preschool only to have it change within a few weeks or months.

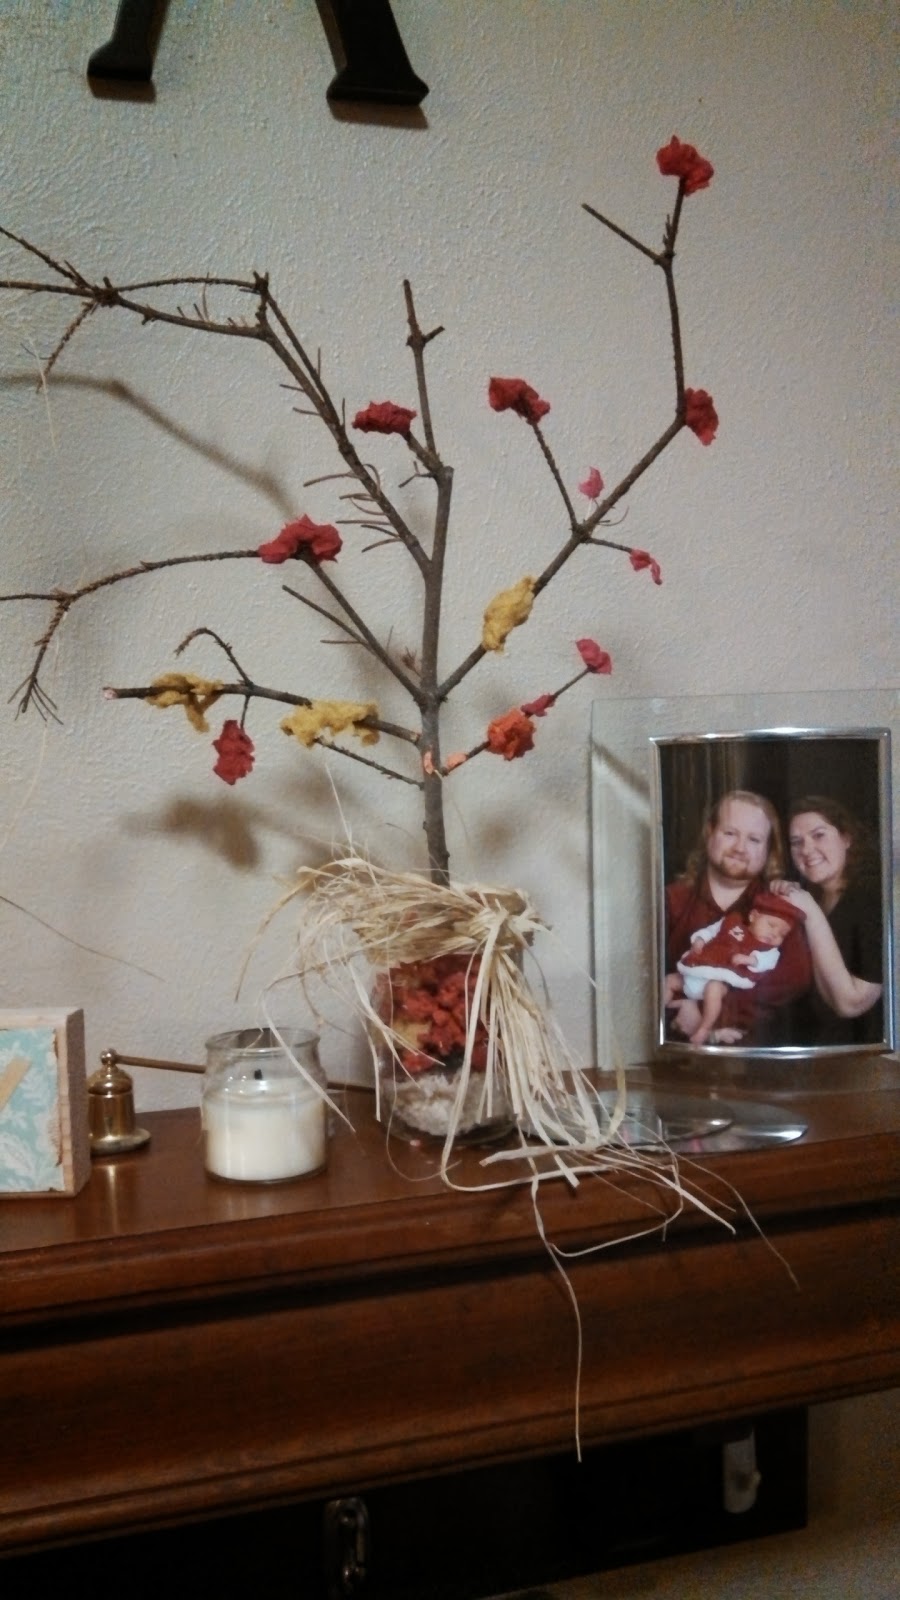
Last year I "home-schooled" her, which is to say that I got several cute books, printed out a few hundred alphabet printouts and did a few projects I found on Pinterest, like this Tree

She-she wanted more.  She craved it.  Begged for it.  Constantly asked if we were going to do preschool projects again.  

So this year, despite a brand new baby coming in Sept. I am planning out an in depth, very detailed, 5-10+ things to do a day away from computer time, TV, and general play.  I really am going to "Play School" with my daughter!  

For the past few weeks I have delved into the realm of Pinterest, TpT, and countless blogs reading about teaching as much as I can.  The good news is I have a bit of experience, I was a substitute teacher with the Meridian School District, a toddler teacher in a day care, and nursery provider through church.  More good news is there are thousands of resources.  So what's the bad news?  There are SO MANY resources!  I am spending hours at my computer (which being on bed-rest these last few weeks has been a good way to pass the time) trying to find the best way to teach, play, and have us look forward to school each and every day.

So in my final week of "prep" for the start of this school year I figured I'd share with you guys how I'm going about doing it so if you have a young child (3-5 year olds) and want to get them involved and ready for school you won't have to spend the 200+ hours I'm currently rolling into this.  You can, of course, adapt this to you however you would like, I hope you enjoy the research I've done!  

~~~~~~

First, print off a calendar/day planner for yourself, I found this one (2015) and this one (2014) from HandmadeHome.net to fit my needs spectacularly.  I will say that the monthly calendars, the weekly calendars, and the reading chart were the only ones I needed for school.  I am scheduling Sept - May and 41 weeks, I printed off 9 reading charts with the goal of 20 books a month to be read to She-she, not counting her own library books, and the chapter book we read at night as a family.

Second, decide what your goals are.  Last year Ashleigh pretty much mastered 90% of the alphabet, she's still a little iffy with her W's and V's.  So I'm hoping to get her involved with some sight words, and bump up her numbers (she's only adding 1s and 2s, easily) and increase her color play.  I also discovered my school district likes to have kindergartners know the days of the week and months of the year, she has no clue on those, so we'll be practicing those daily. 

Third, outline your week/year.  I'm a full-time stay at home mom, but I know that Monday's and Wednesdays my husband will be out playing soft ball in the evenings, and we'll likely want to go so I don't want to do a lot of running and physical play those days (remember I'll be recovering from birth and have a new baby!).  I know her dad also has Friday's off from work, so field trips on Fridays would be ideal because then he could come along.  If you know you're flying to Disneyland the first few weeks of Dec. don't plan school!

Fourth, and this is the part that gets hugely personal, start planning what you'll teach.  I know we're going to do generally do a series of "Wow's." (that's what I'm calling them.) They will include a Word, Color, Number, Letter, Animal, and Food.  That will consist of roughly 30 of my 41 weeks, 26 letters of the alphabet, with 4 as review weeks (particularly for numbers and letters).  The other 11 will be holiday weeks, we're Christian so we celebrate Christmas and most "standards" like Halloween, Thanksgiving, Valentine's Day, etc.  I will also be including a unit on the four seasons, the body, what I want to be when I grow up, the five senses, and maybe a few others depending on my mood.  

Fifth, set up a shopping / check list to get basics.  There is nothing worse than deciding to do a major project with your child and mixing everything together only do discover you ran out of corn starch!  And put them all in a big box together. Here's my list:  (Most can be picked up from the Dollar Store or you'll already have laying around your house.)

Felt / Fabric Scraps
White Liquid Glue (2 bottles +)
Beans or Beads (For counting, gluing, etc.) 
Liquid Starch (For Goo) 
Glitter
Ink Pads
Paints
Shaving Cream
Sticky Stick (That stuff that's like gum to stick paper to your walls)
Googly Eyes
Pipe Cleaners
Paper Plates
Clear Cups
Stickers
Balloons
"Holed" Cereal (Cheerios, Fruit Loops etc.) 
Buttons
Yarn / Thread
Corn Starch
Baking Soda
Vinegar
Crayons
Markers
Construction Paper
Glue Sticks
Safety Scissors
Salt

This list, minus the food I want (for snack time and play with your food time) is pretty much what I plan on using all year, most all crafts I've found can be satisfied with these things.

Sixth, set up a Pinterest board for preschool.  This is the greatest thing you can do for your planning, there's so many great ideas.  

Monday, December 2, 2013

Texture Play

Babies, toddlers, and children all around need to be comfortable with experimenting and texture play is one of the best ways for them to grow accustomed to different things.  There are a lot of different textures children can play with, fuzzies-like teddy bear furs or cotton balls, slimes like Goblin Goo and Shaving Cream Paints, and doughs of all sorts - edibles, snows, sands.  Not to mention dozens, if not hundreds of toys and books.

Don't forget when playing with your kiddos as they work with the different textures to help them learn descriptive words, if they're very young, like rough, slick, soft, hard, hairy, fluffy, or if they're older help inspire them to think, like what happens when we stretch it?  What happens when we squeeze it?  What happens when we roll it?  Does it hold its shape when you let go?

Involve your young one with things you do in your daily life that have different textures, like baking, cleaning with sponges and water, involve her in the art projects, the fun and the work.  Talk about the difference between pastas, and the texture of the carpet versus the tile.  Let your babies ask questions.

She-she and I played with Oobleck, (Corn Starch and Water) she's young enough that we didn't discuss polymers, or the actual physics behind it, but we did discuss that sometimes things are liquid and some are solid.  We came up with a few other things that are in solid and liquid states that she's familiar with, water and ice, cake and batter, ice cream and milk.

Remember though, that any sort of learning through play is about the play first to your child, don't make learning un-fun!

Tuesday, November 19, 2013

Fall Days - Preschool Tree Time!

One of my all time favorite times of the year is the transition from fall to winter, the leaves changing color, the chill in the air, the holidays looming and coming and looming and coming, the children's crafts, the excitement, the giggles.... I could go on forever.  

Yesterday I wrote a post about taking advantage of every learning opportunity you get, but I should also admit that I do have a formal "preschool" time with my daughter, we attempt one to three times a week, sometimes we'll get in all five days and sometimes we'll skip a week entirely.  It's flexible because she is young, and because we're busy!  But I do have an entire binder that I have started to accumulate awesome homeschooling things within, things like free printables (http://www.allkidsnetwork.com/worksheets/) and crafts like the one we did yesterday which I also got from an amazing blog called Housing a Forest and a rough week-by-week schedule.

Anyways! On to the fun!  While these trees look awesome, and took a while, they were incredibly easy and the kids (ages 2 1/2 and 4) had a ton of fun every step of the way.  

The first thing I did was to shred up about 3 pages of each color of construction paper and put them in about 1 to 1.5 c. water.  This will start the paper pulp, but they need to have a good while to really absorb the water.  As we were doing a fall theme we chose red, orange, and yellow (like the example.) we loved it so much though we might do it in the spring time and do it with green and pink and make apricot tree blossoms.  

While the paper was soaking, we made the "Salt dough hills."  Salt dough is the easiest thing to make, 1 c. salt, 1 c. water, 2 c. flour.  If its a little too wet or dry add more flour or water.  Now I didn't know how well these would hold up, and I wanted ours to go on the mantle, so I used wide mouthed pint sized jars and we shaped the dough to fit into it.  (I will say when you bake there's a slight bit of relaxing, so make it a little smaller than the cup's diameter.  I ended up having to rip off some of the edges of their hills to cram them inside.)  The dough once baked however did appear to be strong enough to hold up the single branch trees,  I had also thought about putting them in little tins from the dollar store, but liked the mason jar look.  You can use whatever you want for the base. 

The kids helped with every step of this process from pouring flour to mixing to rolling and playing.  When they had the basic shape of their "hills" we stuck in our branch (just pulled from my own back yard.) to give it the general fit for the branches.  Then I stuck them in a 250 degree for about 30-45 minutes.  I wanted them to be dry enough to paint, but still moist enough to force the tree into.
While the dough was in the oven we worked on our ground covering - what else but a pile of leaves?  We took the colors and put them in the blender, (lightest first) and blended up the paper.  I found that I needed to add extra water to make a good pulp of each of the colors.

Once the pulp was finished I let the kids each have a color and we started pinching out paper.  I covered a plate with paper towel (to help with the mess and to absorb the extra water) and we each started pinching the leaves out.  For individual lives simply squish the water out and set them on the towel.  My daughter did this for a bit, before deciding she didn't like the individuals much and decided to roll it into a big ball and crumble it and squish it, honestly, it looked just as awesome and resembled more a raked pile that the kids had played in then the perfect ones.   

Baby B (though not much of a baby any more!) was much more precise and preferred to only take a few fingers to squish the leaves individually.  Both of them ended up getting some beautiful leaves and a good pile by the end because neither wanted to just leave the paper to dry, both wanted to play with the pulp a bit, and as it was their day I wanted them to do what they wanted to do.  
When they were done with the leaves I pulled the dough out and let it cool while we did lunch.  Once cooled the kiddos enjoyed painting their hills "natural" hill colors, browns and greens.  This also allowed the leaves the opportunity to dry while they painted.  When they were done with the painting we did some fun time away from crafts to let them dry.  When I could handle it I put them into the pint jars and pushed the tree into the dough.  I thought I would need to hot glue this, but it was a nice snug fit, I can only assume from the expansion while it cooked.  
Once the trees were in their jars it was time to start putting the leaves on the tree itself.  The fun with this was how random and easy it could be, you could put as much or as little on as you want, it looked good with the branches in bare and the ground leaves we'd done earlier in the jar.  I had to help B a bit to get the leaves to stick in the beginning, but by the end he was figuring it out and wrapping it well.  The thing I would recommend is that the older party help squeeze some of the water out to ensure the paper will stay on the branch.  If they got too big of a wet clump it would all fall right off. Also I have to agree with the Housing a Forest author - the more erratic the better.   

She-she's Tree.
Baby B's Tree
Once that was done we tied a bit of raffia around the pint jars and I set them on the mantle to dry. If you don't have / don't like raffia, fabric, burlap, ribbon, yarn.... pretty much anything to accent it would work.

It's Gorgeous!!! It's totally a craft that I want to display in my home. :)  It may even be a yearly tradition and at $0 a tree it would be one we can always do no matter what finances look like.  :)  For sure my favorite craft of the year thus far.

Monday, November 18, 2013

Every Opportunity

My daughter is four years and one month old, and since the beginning I have believed that every opportunity can be a learning experience, even in its joy.  Play is one of the best ways for a child to learn, whether social skills like manners, sharing, and how to handle a disagreement or educational skills, like the alphabet, mathematics, history, shapes, colors, science...

I remember one day She-she an I went to the grocery store, she was perhaps five months old and certainly not speaking yet.  Despite the fact that it was just the two of us I was chattering away with her, asking her opinion on fruits and veggies, talking about the ripeness, and letting her smell and feel things like pineapples and kiwi.  After a while a woman turned and glared at me, "Who are you talking to?" she snapped and I looked pointedly at the carseat with my little angel in it.

"My daughter," I said, not certain what I'd done to upset her for talking to my child.

The woman, tilting her head and full on scowling said, "She cannot talk yet, she is too young."

I just raised an eyebrow and said, "How do you think she learns?"  Then I proceeded to talk to She-she and walked away from her.

Even though that was nearly four years ago I still remember it like yesterday, still remember her "are you stupid" tone and me thinking "you must be crazy."  The fact is every opportunity I get I talk to my daughter, I tell her about the world and what we see, I have since the day she was born.

She-she was an early talker, and she speaks well.  She knows the alphabet, can count, can sing several songs on her own.  And I believe this is because her father and I surround her with enjoyable learning.  She helps me sort the laundry, she helps me count how many apples I have and how many I need.

I believe as a mother my major goals in life are to prepare her for a full and enjoyable life, school, friends, people, conflict, self esteem, and all this comes from taking every opportunity to teach her, I do this by providing her as many learning opportunities as I can and being involved in her life.

Some tips for bringing learning into every day life:

~Teach colors, ask your child to pick clothes of a specific color, explain the difference between dark blue and light blue.

~Count everything.  Count the fruits and veggies they're eating, count the number of books they have, count the photos on the wall.

~Show them signs.  "Please walk."  "The Dollar Store."  Signs are all around us and may be the first examples of letters they ever see.  Point to the letters of their name if you can get close enough.  Let them touch if they can.

~Make up goofy songs to help them spell and learn.  She-she has a song about her name that her dad sang her when she was about a year old.  Even before she understood what the letters meant she was spelling her name.  Its also a great way to teach them your phone number in case they ever get separated from you.

~Take them to learning-full places, parks with numbers and letters, science projects, music.  Instead of taking them to Chuck-E-Cheeses for their birthday take them to The Children's Museum, an art studio-where they can do their own art, a kid's science facility, a restaurant where they can see the chef work, etc.  Its tempting when you go to these places to go with another parent, which is fine, but make sure you take advantage of one-on-one time as well.  Give your child the opportunity to ask questions and to play with you.

~Encourage questions and answer in ways they understand.  About six months ago She-she asked me how crayons were made.  Since I knew only the bare necessities, colors and wax were mixed and melted we went to Youtube and watched a video together.  It was enjoyable for both of us.

~And an obvious one: Books.  Fill your child's life with books, whether they're your own or the libraries.  There are all sorts of different kinds, and picture books can be just as informative as text books, especially to an early reader.  Read to your child, whether at night or in the morning or in the car (not while you're driving.) When they're potty training let them read on the toilet.  (It relieves the stress on them too.)  Ask them questions about what they read, everything from what color is her hair, to what was the problem ____ had?  How did they fix it, etc.

When they start learning to put their letters with what they look like start working on the sounds they make too.  Have them sound out some words with you.  In short, your child can be and is likely a brilliant person, but they don't know it until you show them.  So show them every opportunity you get!