Diffuclty Rating: 1.5 - Child's Play
(Scissors should be used with adult supervision.)

She-she's bedroom started out as a "baby bug" room, particularly the "pretty" bugs like lady bugs, dragonflies, and butterflies, but as she's gotten older she's wanted more and more Tinkerbell. We have a slightly "odd" bed for her - its dimensions are not quite toddler and not quite child, so i decided to make her a fleece tied blanket all to herself.

I took my sweet little girl to JoAnn's with me and we chose two fleece's - one of course with Tinkerbell, and one with the background. I particularly wanted the little "bumpy" fleece as it was extra soft and cute, She-she chose the color.
Now you've probably seen this before, as its incredibly easy and they were hugely popular some eight to ten years ago. but for a quick reminder this is how you do it:
Step 1: Choose two of roughly the same weight fleece fabrics. place them together right sides out. There is no flipping reverse sides like regular sewing.

Step 2: Going in about 3 inches cut 3 inch long strips about an inch apart. I did the first few with rulers, and had the ruler sitting there to check when I felt they were getting a bit off.

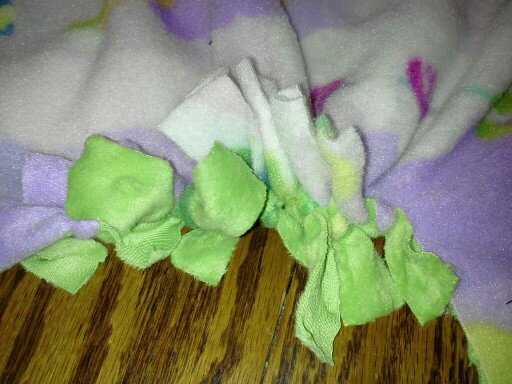
Step 3: Using the front and the back strips (in my case Tinkerbell and the green bubble fleece) tie a simple square knot. I
highly, let me repeat that,
HIGHLY recommend knotting every few strips. A strong wind, playing kids, running cat or anything else could move your fabric so the front and back cuts are off and your ties will be all messed up.
Step 4: Repeat until you come to about 3 inches out of the corner, tie it snugly and don't worry about bunching you'll stretch it a bit later. When you reach the corner, simply cut the rest of the fabric off. (See photo.) Then continue going along the other side with the same knotting method you used, repeating the corner cutting until you are to your very first corner.
Step 5: You will likely notice that your fabric is incredibly bunched, this is normal and shouldn't concern you. Simply grab it along one edge about 6 inches apart and pull it to stretch it back out to its regular grain. You may hear a little tearing here, but that's normal. Watch what you're doing however as it is possible to rip a knot right off, but its difficult.
Step 6: Fluff the edges and tighten any that have gotten lose, once tightened they will do well for several years.
In fact, I have a quilt my mother made me using this method when I was still in high school (I wont say how many years ago that was haha!), other than having to tie a few knots over the years its been fantastic, none of the edges have torn off and while some stress has been made to it, its still in very good shape.
So if you're looking for a sweet gift idea or a fun thing to do on a slow Sunday why not opt for a quick fleece quilt?


 5. Using a file rough up one side (the side you intend to glue) this helps it adhere fully.
 6. Liberally apply the glue to both sides and stick together.


 10. And glue them on.
.jpg)